2023 Anniversary Event Minigame & Strategies Guide!
Hello! My name is MooingCat and welcome to my minigame tutorial and event strategies for the 2023 Anniversary Event! In this guide I will go through all the rewards you can get in this event, I'll guide you through the mechanics of the brand-new minigame, and go over strategies on how to get the most out of the event!
You can also check out my videos on the event:
Table of Contents
Event Rewards
Let's start by quickly looking at the rewards, because there are some really good ones this event!
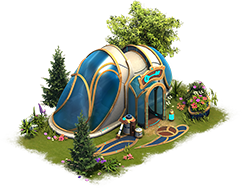
Main Building: Tower of Conjunction
The Tower of Conjunction is a 3x7 building with 11 levels, with 4 different variations at the final level. Sadly, like in the St. Patrick's Day Event, this building also requires a special "Golden" upgrade kit to upgrade to the final level, but more on that in the strategies section! Let's first look at the Level 10 building:
Note: Where values depend on age, they will be displayed as "BA-SAJM" values.
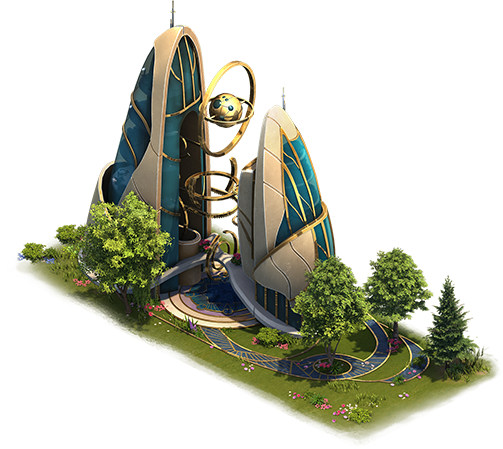
Tower of Conjunction Level 10:
- Size: 3x7 (NO road required!)
- Medals, Supplies
- 9-11 Forge Points
- 20-22 Goods
- 12-22% Attack for Attacking Army (0.57-1.05 per tile)
Below are the 4 different variations at level 11, for a full comparison check out my sortable table!
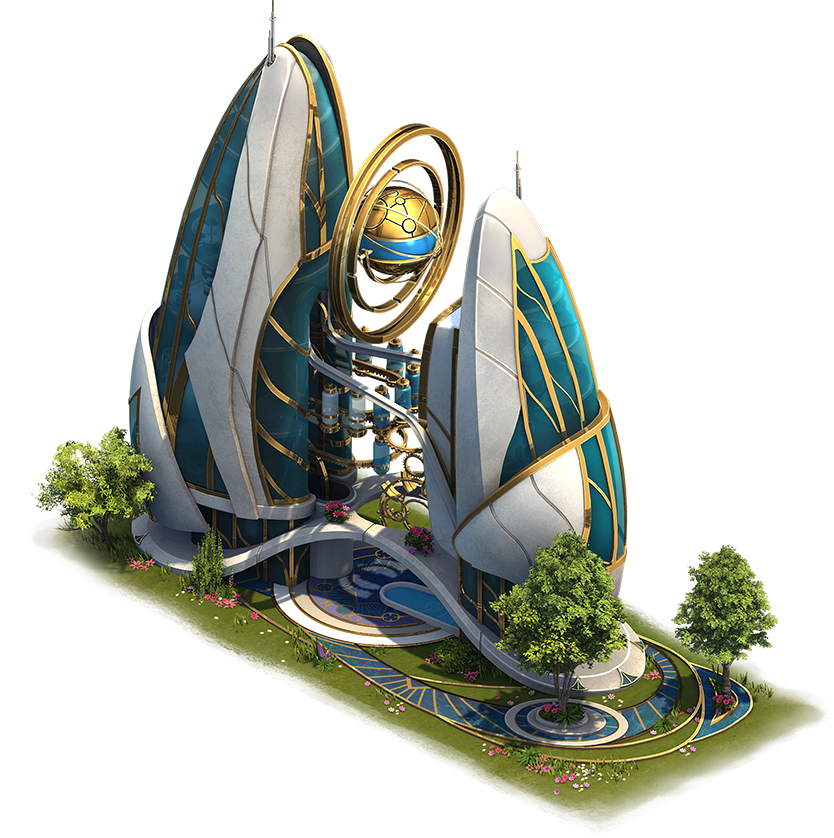
Royal Tower of Conjunction (Level 11):
- Size: 3x7 (NO road required!)
- (More) Medals, (More) Supplies
- 9-11 Forge Points
- 20-22 Current Era Goods
- 27-29 Previous Era Goods
- 25 Guild Goods
- 1 One Up Kit Fragment (30 required)
- 12-22% Attack for Attacking Army (0.57-1.05 per tile)
- 40-42% Supply Boost
Cardinal Tower of Conjunction (Level 11):
- Size: 3x7 (NO road required!)
- Medals, Supplies, Coins
- 14-16 Forge Points
- 20-22 Goods
- 1 Renovation Kit Fragment (30 required)
- 12-22% Attack for Attacking Army (0.57-1.05 per tile)
- 34-36% Coins Boost
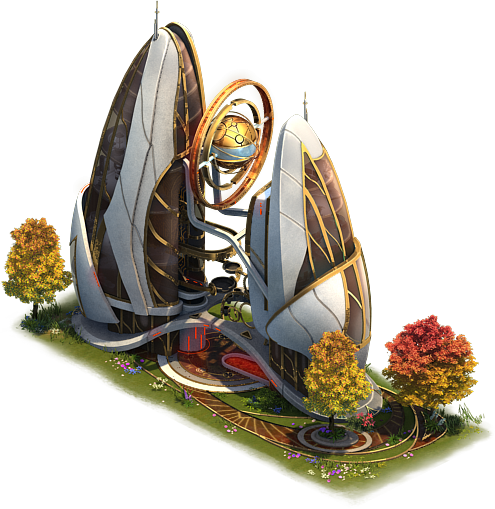
Phantom Tower of Conjunction (Level 11):
- Size: 3x7 (NO road required!)
- Medals, Supplies
- 9-11 Forge Points
- 20-22 Goods
- 25-35% Attack for Attacking Army (1.19-1.67 per tile)
- 18-28% Defense for Attacking Army (0.86-1.33 per tile)
- 16-26% Attack for City Defense (0.76-1.14 per tile)
- 17-27% Defense for City Defense (0.81-1.29 per tile)

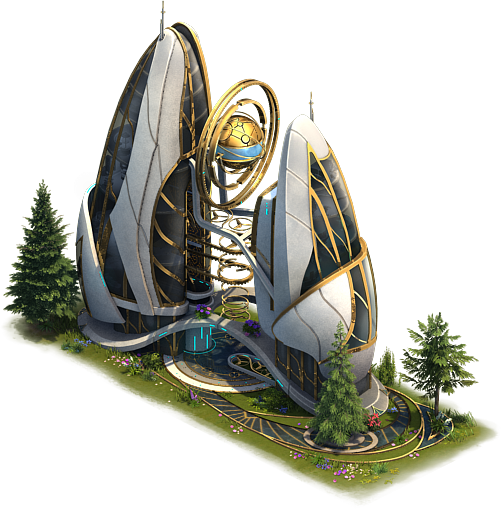
Scholar Tower of Conjunction (Level 11):
- Size: 3x7 (NO road required!)
- Medals, Supplies
- Population, Happiness
- 9-11 Forge Points
- 20-22 Goods
- 4 Blueprints
- 4 Units
- 12-22% Attack for Attacking Army (0.57-1.05 per tile)
The level 10 building is alright, nothing amazing, but not too bad either. At level 11 though you have some really good options! It probably comes as no surprise that my recommendation is the Phantom Tower of Conjunction. It has a combined attack of up to 3 per tile, which is an insane increase compared to the likes of Mountain Reserve, House of Horrors, etc at around 2.2. Also, now that city defense will be used in GE5 the city defense this building gives will come in real handy.
If you don't care about attack, the other options are quite good in their own areas, so by all means go for the one with the stats you're interested in :)
Grand Prizes & Milestones
To get the main building fully leveled you need 3750 progress towards grand prizes. This will give you 3 levels from Milestones, 7 regular upgrade kits, and the golden upgrade kit. The Grand Prizes will first have a few unique rewards, before it starts looping between 2250 and 6750 progress.
| Progress | Rewards (Unique) |
|---|---|
| 0 | One Up Kit |
| 250 | Tower of Conjunction Up. Kit |
| 500 | Boost Crate |
| 750 | Tower of Conjunction Up. Kit |
| 1000 | 70 Goods |
| 1250 | Tower of Conjunction Up. Kit |
| 1500 | 50 Forge Points |
| 1750 | Tower of Conjunction Up. Kit |
| 2000 | 50 Next Age Goods |
| Progress | Rewards (Looping) |
|---|---|
| 2250/7000/.. | Tower of Conjunction Up. Kit |
| 2500/7250/.. | Unit Box |
| 2750/7500/.. | Tower of Conjunction Up. Kit |
| 3000/7750/.. | Tower of Conjunction Level 1 |
| 3250/8000/.. | Tower of Conjunction Up. Kit |
| 3500/8250/.. | Renovation Kit |
| 3750/8500/.. | Tower of Conjunction Golden Up. Kit |
| 4000/8750/.. | Tower of Conjunction Up. Kit |
| 4250/9000/.. | 90 Special Goods (AF+) / 90 Next Age Goods (BA-FE) |
| 4500/9250/.. | Tower of Conjunction Up. Kit |
| 4750/9500/.. | One Up Kit |
| 5000/9750/.. | Tower of Conjunction Up. Kit |
| 5250/10000/.. | Boost Crate |
| 5500/10250/.. | Tower of Conjunction Up. Kit |
| 5750/10500/.. | 70 Goods |
| 6000/10750/.. | Tower of Conjunction Up. Kit |
| 6250/11000/.. | 50 Forge Points |
| 6500/11250/.. | Tower of Conjunction Up. Kit |
| 6750/11500/.. | 50 Next Age Goods |
New Building: Key Master's Workshop
In addition to the main building, we also have a cash only building that you can get from the event pass. You can get 1 selection kit from Leagues, but you need 4 levels to get it fully leveled, so you need to spend real money on the event pass regardless. That's a shame, because it's a really good building :/ The main reward from this building is 2 fragments for the Tower of Conjunction Selection Kit (which includes Golden Upgrade), 100 fragments required. If you buy the event pass you should be able to get 2 of these buildings to level 4 with the free currency, which means you can get a selection kit every 25 days, so 1 full Tower of Conjunction every 275 days. Blue Galaxy can double the fragments.
- Size: 3x2 (road required)
- Negative Population/Happiness
- 6-8 Forge Points
- 18-20 Goods
- 9-11% Attack for Attacking Army (1.29-1.57 per tile)
- 10-12% Defense for City Defense (1.43-1.71 per tile)
- 2 Tower of Conjunction Selection Kit Fragments (100 Required)
- Where to get it?: Event Pass, 1 selection kit from leagues
To see all the event pass rewards, check out the fandom wiki
Daily Specials
How many daily specials can you get? I will go into more detail further down in the guide, but my rough estimate is around 20-23 on average.
There are a lot more daily specials that can be considered good, so for a complete list check out the fandom wiki ("list of possible Switched Prizes"). Below are a select few of my top recommendations:
- Harvest Farm Selection Kit: My top pick for attack for attacking army, especially for people in lower ages.
- Mountain Reserve Selection Kit: My top pick for combined attack/defense for attacking army.
- Governor's Villa Selection Kit: In terms of attack this building is behind the Harvest Farm and Mountain Reserve, but it does give a few units, and based on current spoilers it seems like it will get an additional "golden" level in the upcoming pirate/summer event!
- Horror Circus Selection Kit: My top pick for FPs per tile, this set has some really good FP layouts! Check out my video on the set for more information!
- Vineyard Estate Selection Kit: A good choice for a lot of FPs, Attack, and/or Defense quickly, especially for players in lower ages (that don't plan to advance quickly), or those who want a lot quickly regardless of age.
- Knights Pavilion: Nice little building for unit production, if you need that.
- Sleigh Builder: Nice building to have for current age productions in events.
You can compare all the available buildings from daily specials in my sortable table: https://www.mooingcatguides.com/tools/sortable-table
Leagues
This event has a league system based on the amount of progress you get toward the grand prizes, but more on that later. Due to the event balancing on beta, we can't really use that to make any estimates on how much progress you need to land in a given league, and in any event, it differs a lot from server to server and world to world.
In the leagues, you can win the two "epic" kits in this event that has previous event buildings. In Silver and Gold you can win a selection kit for the Tower of Conjunction, which includes the golden upgrade. In Gold you can win a selection kit for the premium only Key Master's Workshop, though you need 4 levels for this to really be useful.

Quest "Cheat List"
Below you'll find my "cheat list" for the quests in this event. This is not a complete list of quests, that you can find here on the fandom wiki. This is a list of quests you might need to plan ahead for, but I always recommend that you check out the complete list yourself to see if there are any other quests you might find challenging. Also, only the "difficult" part of a quest will be shown. For example, a part like "pay X coins" will not be included.
Event Mechanics - Minigame Tutorial!

The event mechanics are brand new this event, so let's go through them! In the image above I have split the event window into three sections. I've already gone over the rewards, so in the next chapters I will explain how the minigame and opening chests work, and I'll give you my tips and tricks on how to best complete the minigame! Also make sure to check out my chapter on strategies for my recommendations on when to spend your event currency on the minigame. Speaking of which:
Currency: Energy
The main currency of this event is Energy (actually called "Energies", but that's a terrible name, so I'll use "Energy" :P). You use Energy in the minigame to "spawn" "gems", but more on that in the next chapters!
Energy:
- Starting: 110
- Daily Logins: 21*80 = 1680
- Rush Quests: 40*90 = 3600
- Daily Quests: 21*170 = 3570
- Milestone: 500 + 1100 = 1600
- Total: 10 560 Energy
You can also get Energy from Incidents, in fact you should be able to get quite a lot, potentially over 1k. I got 1*500 + 2*100 + 21*20 = 1120 Energy on Beta.
Energy Diamond Costs:
- 60 Energy for 220 Diamonds
- 310 Energy for 990 Diamonds
- 820 Energy for 1990 Diamonds
The diamond costs are really high this event, and the event mechanics also makes diamond spending really expensive. I'll go over it later, but in my opinion it's better to save your diamonds for the Wildlife Event.
Minigame Tutorial: Basics
Your goal in the minigame is to merge gems to gain progress toward grand prizes, get small rewards, and to create keys you can use to open chests (for daily specials). Let me go through what all of that means :) I'll explain how to start a new board further below, but when you have started one you will get a board like this:

You will start with 32 locked gems, which you can distinguish by their glass-like background pane. You can not merge two locked gems together. You will notice that there are three different colors and that each color has gems of 4 different sizes / levels:
| Gem Type | Level 1 | Level 2 | Level 3 | Level 4 |
|---|---|---|---|---|
| Water Gem ("Blue") |  |
 |
 |
 |
| Wind Gem ("Green") |  |
 |
 |
 |
| Fire Gem ("Red") |  |
 |
 |
 |
Each locked gem has a "key piece", either a top ![]() or bottom
or bottom ![]()
![]()
![]() piece. To create full keys
piece. To create full keys ![]()
![]()
![]() you need to merge two gems with a bottom and a top key piece. To avoid confusion, these are the results of all ways of merging two gems with keys/key parts:
you need to merge two gems with a bottom and a top key piece. To avoid confusion, these are the results of all ways of merging two gems with keys/key parts:
- Top + Top = Top Piece
- Bottom + Bottom = Bottom Piece
- Bottom + Top = Full Key
- Full Key + Full Key = Full Key
- Full Key + Bottom or Top = Full Key
Note: There has been some confusion on what is "top" and "bottom" piece. In the game files these ![]()
![]()
![]() are called "bottom" and this
are called "bottom" and this ![]() "top". Like many I think it is more natural to swap the names, but because that's what they are called in-game that's what I'll be using. In any event, as long as you are consistent it doesn't really matter which you call "top" and "bottom" :)
"top". Like many I think it is more natural to swap the names, but because that's what they are called in-game that's what I'll be using. In any event, as long as you are consistent it doesn't really matter which you call "top" and "bottom" :)
 Before I go through merging and gem levels, in order to actually collect keys from gems, you need to create level 3 or 4 gems with full keys. Level 3 gems will give you 1 key and level 4 gems will give you 3, so whenever possible you want to create level 4 gems with a full key. To collect the keys, you need to convert the gem using the converter. First click on the gem with a key, then click on the converter. For reasons I will go over later, I always recommend leaving at least one free level 4 gem until the end of the game before converting it, though personally I like to convert all keys at the end of the game.
So how do merging and gem levels work?
 Before you can start merging gems, you need to spawn free gems by clicking on the spawner, which costs 10 Energy and will spawn a gem on a random free tile. This is the main thing you will spend Energy on this event. To merge gems, you need to merge a free gem with either another free gem or one of the locked gems of the same level. This will create a new free gem one level above the two gems you merged, with key/key pieces depending on what the two gems you merged had (see above).
If you merge a free gem with a locked gem, also referred to as "breaking" a locked gem, you also get a reward as described further below. In the strategies section I go over how many free gems I recommend buying each board depending on your strategy, but my recommendation is to buy all at once so that you have a better overview of the gems at your disposal. Once you have bought the number of gems you plan on buying, the board will look something like this:

To merge a free gem with another gem, you first click/press on the free gem, and then click/press on the gem you want to merge it with. You can only merge a gem with another gem of the same color and same level. When you click on a free gem, all the gems you can merge it with will be highlighted, which can be quite helpful in figuring out which gem to merge it with. If you have selected a gem but don't want to merge it, either click on the same gem again, or click on an open tile. This will move the gem to the open tile. Where a gem is located on the board does not matter at all, but it can be helpful to organize gems by size and color to move them around. Just make sure you don't accidentally merge two free gems you didn't plan on merging!
When you merge two gems of a level, it will turn into a gem of the next level. So:
- Level 1 + Level 1 = Level 2
- Level 2 + Level 2 = Level 3
- Level 3 + Level 3 = Level 4
- Level 4 + Level 4 = Level 4
Merging a free gem with a locked gem also gives you some rewards. Depending on the color, you will get rewards like coins, supplies, goods, units, etc, but you will also get progress toward the grand prizes. If you click on a locked gem (make sure you haven't selected a free gem first!), you will see the rewards you can get at the bottom of the event window. The balancing of the grand prize progress changed a lot on beta, but the final balancing is this:
- Breaking a locked level 1 gem: 1 Progress
- Breaking a locked level 2 gem: 1 Progress
- Breaking a locked level 3 gem: 1 Progress
- Breaking a locked level 4 gem: 2 Progress
Before you start merging, you should do a bit of planning to get the most out of the board!
Minigame Tutorial: Planning & Merging Gems!
Check out my video showcasing how to use this guide!
This is definitely the most important part of the minigame, but it can also be quite challenging. Your goal when planning is to 1) create as many keys as possible and 2) merge as many free gems with locked gems as possible. To make it easier, let me walk you through my thinking process, starting with a quick hack you can do before you even start to think!
Level 1 Gem Hack: The first thing I always do is check if I can merge gems without having to think. If the number of free level 1 gems of a color is more or equal to the number of locked level 1 gems of that color, I immediately merge all those free gems with the locked gems. If after this I have 2 or more free level 1 gems, I also merge them (unless I plan to try to "clear" the board - more on that later). In general you should always break as many locked gems as possible, and if you have more free than locked gems you can do it without thinking about which locked level 1 gems you break.

Alright, with that hack out of the way, let me go through my process on "solving" the minigame. I like to do this color by color, so that I only have to think about one color at the same time. In other words, my recommendation is to apply the process I'm about to describe to each color in turn :)
Part 1: Get an Overview of the Key Pieces
The first step is to count the number of key pieces and where they are located for the color you're working on. Using red as an example, you can see that there are 10 top pieces and 5 bottom pieces. The number of keys you can get from a color is at most equal to the lowest number, so for red this means 5 full keys. In this example, the five bottom key pieces are spread across each gem level, with two on level 2 gems.
If you play on browser the FoE Helper extension has a very helpful window that displays the number of key pieces for each color and on which level they are. I've cropped out the red portion of it as an example, but the other colors are there as well, in addition to some other helpful information:

The last entry shows how many full keys you have currently crafted out of the max possible number.
Part 2: Plan how to Merge Gems
In the following steps I will describe my process of planning which gems to merge together. Ideally you should plan through all the steps before you start merging, but I realize that can be quite hard and/or time-consuming. So you can merge directly in each step, which will often work perfectly fine, but every now and then you might find that there was a better way if you planned all the way in advance.
Also, keep in mind that what I'm about to describe is very methodical in order to thoroughly explain my thinking process, but once you have played a bit you should be able to do this based much more on intuition, without having to think through everything in this much detail.
Part 2.1: Merging Level 1 Gems
The general rule when merging level 1 gems is to break the gems with the key pieces you have the least of in the level 2-4 gems. Keep in mind that each time you merge a level 1 gem you will add to the level 2-4 gem numbers. For example, here we start with 4 bottom pieces and 5 top pieces, but after we merge the first level 1 bottom piece, that goes up to 5 of each piece. When both of these numbers are equal it doesn't really matter, though for this example we now only have top pieces left in level 1 gems.

Now we need to keep track of all the level 2 gems we will get by following the process above. You can either keep track in your head or you can write it down, or as mentioned above you could merge everything now. Writing it down for this example, we would end up with the following level 2 gems:
- 3 Free Gems with Top Pieces
- 1 Free Gem with Bottom Piece
- 1 Free Gem without Key Piece
- 1 Locked Gem with Top Piece
- 2 Locked Gem with Bottom Piece
Part 2.2: Merging Level 2 Gems: When merging level 2 gems you should follow the steps below.
- Step 0 (New): If you have two free level 2 gems without key pieces + two locked and/or free level 2 gems with opposing key pieces + two level 3 gems with opposing key pieces: Merge both of the free level 2 gems with the two opposing level 2 gems. If you can choose between locked or free level 2 gem with key piece, choose locked first.

- Step 1: Merge any two gems with opposing key pieces. First all free + locked gem combos, then any remaining free + free combos.
 /
/ 
- Step 2: Merge free gems that don't have key pieces with gems that do have key pieces. First all free + locked gem combos, then free + free combos. If you can choose between both key pieces, choose the one there are least of in level 3 and 4 gems, similar to level 1 merging.
 /
/ 
- Step 3: Merge any remaining gems. If you are planning on clearing the board only merge gems if required.

Applying the steps to our example:

We would end up with these level 3 gems:
- 3 Free Gems with Full Keys
- 1 Free Gem with Top Piece
- 2 Free Gems without Key Piece
- 1 Locked Gem with Top Piece
- 1 Locked Gem with Bottom Piece
Part 2.3: Merging Level 3 Gems: When merging level 3 gems you should follow the steps below.
- Step 0 (New): If you have two free level 3 gems without key pieces + two locked and/or free level 3 gems with opposing key pieces + two level 4 gems with opposing key pieces: Merge both of the free level 3 gems with the two opposing level 3 gems. If you can choose between locked or free level 3 gem with key piece, choose locked first.
- Except: For each free level 4 gem you spawned, if you have two level 4 gems with opposing key pieces, don't include those as available for this step.

- Step 1: Merge any two gems with opposing key pieces. First all free + locked gem combos, then any remaining free + free combos.
 /
/ 
- Step 2: If you have a free level 3 gem without a key piece, and both a locked level 3 and level 4 gem with opposing key pieces, merge the two level 3 gems.
- Except: For each free level 4 gem you spawned, if you have two level 4 gems with opposing key pieces, don't include those as available for this step.
 /
/ 
- Step 3: Merge level 3 gems that have full keys with other level 3 gems. If possible with a locked level 3 gem, if not with a free level 3 gem without a full key, or if neither of those are available with another level 3 game that has a full key.
 /
/  /
/ 

- Step 4: Merge any remaining gems. If you are planning on clearing the board only merge gems if required.

Applying the steps to our example:

We would end up with the following level 4 gems in our example:
- 4 Free Gems with Full Keys
- 1 Free Gem without Key Piece
- 3 Locked Gems with Top Piece
- 1 Locked Gem with Bottom Piece
Part 2.4: Merging level 4 gems: Finally, you might have a few level 4 gems to merge, but keep in mind you should never merge two level 4 gems with full keys, if you do you will just lose half the keys.
- Step 1: Merge any two gems with opposing key pieces. First all free + locked gem combos, then any remaining free + free combos.
 /
/ 
- Step 2: If you have any spawned level 4 gems and two locked level 4 gems with opposing key pieces, merge the three gems together, one by one.

- Step 3: Merge any free level 4 gem with all remaining locked gems (for the progress).
 /
/ 
Applying the steps to our example:

In this example, we actually have the situation described in Step 2, so we get an additional full key from there. Combined with the keys from merging level 3 gems, we successfully got all 5/5 keys following this process.
Part 3: Execute Plan & Convert All Keys
If you planned everything in advance, now is the time to execute your plan! Once you have merged everything you're able to merge, you should convert all the keys you have generated. It's important that you convert all the keys before completing a board, otherwise you will lose a lot of the keys. Speaking of which, let's go through how ending a board and starting a new one works!
Minigame Tutorial: Completing / Starting Boards
The board never resets on its own, so to reset it you need to "complete" it. There are two ways to "complete" a board:
Clearing out all locked gems will allow you to reset the board for free. If you do this you might get some extra keys depending on how many gems you still have on the board. If you click on the (?) you will see an explanation of how, but in general I do not recommend focusing on which gems you have remaining, chasing after these extra keys will practically always be more expensive than just taking what you're given. If you clear a board, you will also get the "board completion reward". The board completion reward is a chest with a chance of giving one of One Up Kit, Renovation Kit, Instant Finish One Special Building Kit, Epic Historical Questline Selection Kit, Epic Anniversary 2023 Selection Kit, or Instant Finish All Special Buildings Kit. Some of these rewards are quite nice, but as I will go over in the strategies section I do not recommend chasing for the completion reward, it's usually not worth it. Instead, I would go for the other way of resetting the board.

You can reset the board at any time by paying some Energy. The first time you reset the board each day is free, then it costs 20, 40, 80, etc Energy to reset the board more times. The cost doubles each time, until it resets back to 0 at midnight server time. Because the cost grows big very quickly, you should play games on as many days as possible to take advantage of the free reset and lower cost of the first few resets. For more on that check out the strategies section!

Minigame Solver!
After struggling for a while to formulate my process for merging gems, I ended up doing what I do best, I started writing down the "algorithm" in pseudo-code. That made me think - why not make it actual code instead? So that's what I did, I spent a few hours writing this "solver" that will generate a suggested plan on how to merge gems! To use it, you simply enter in the current state of your board for a specific color, and then you hit run! It should then generate a plan that you can follow. You can see how it works if you open the "solver.py" tab - it's pretty much just a bunch of if statements based on the steps described in previous chapters.
I can not guarantee that it always finds the best solution, but based on my testing it seems to work really well. In many situations the solver can tell for sure if it is the best solution for the given situation, if so it will say so in the results section of the plan. When not sure, it will instead say "likely the best". Depending on how much you care, you can decide to blindly trust that, or ideally you can double-check yourself to see if you can find a better way. As I said though, I'm fairly confident it will find the best solution most of the time :)
To use it, simply update the information mentioned in the simulator widget, then hit the "run" symbol (black triangle). A suggested merge plan will be printed on the left side!
If you can't see/use the simulator you can use this link: https://trinket.io/embed/python3/10ccacc06b
UPDATE 14/04: Trinket.io was down for a bit, but should be back up again now. Let me know if you still have any issues.
If you can't see the area where you enter information, click on the "edit" symbol (red arrow). Then to run the simulation, hit the black triangle (green circle):

Minigame Tutorial: Opening Chests
Note: One of the Daily Challenges gives 9 keys each day
Another major part of the minigame is to actually spend your keys! On the right side of the event window you will see three chests you can choose from, costing between 3 and 18 keys in total. The available number of chests of each cost is actually different, so some chests are more likely to appear. To only way to reset chest costs is to buy one of the current chests, they do not reset at midnight.
When opening a chest you get a reward, with a chance of giving the daily special. You can open the chests whenever you want to, so playing the minigame to get keys and opening the chests are actually separate, meaning when you play and when you pick up daily specials are not linked directly! Below are all the available chests:
| Chest | Icon | Spawn Chance* | Cost (# key types) | Progress (per key) | Daily Special Chance (per key) |
|---|---|---|---|---|---|
| Bronze 1 |  |
40.5% | 3 Keys (one type) | 3 (1.0) | 5% (1.67) |
| Bronze 2 | |
40.5% | 6 Keys (one type) | 6 (1.0) | 10% (1.67) |
| Silver 1 |  |
66.2% | 9 Keys (two types) | 10 (1.11) | 14% (1.56) |
| Silver 2 | |
40.5% | 12 Keys (two types) | 15 (1.25) | 18% (1.5) |
| Gold 1 |  |
40.5% | 15 Keys (three types) | 21(1.4) | 20% (1.33) |
| Gold 2 | |
71.7% | 18 Keys (three types) | 27 (1.5) | 24% (1.33) |
*This is based on the fact that there are 3 different Bronze 1, Bronze 2, Silver 2, and Gold 1 chests, 6 different Silver 1 chests, and 7 different Gold 1 chests, and that each is as likely to appear as the other (which seems to be true based on my testing).
Balancing Key Colors:
Choosing a chest might seem straightforward, pick the most expensive chest for grand prize progress, or the cheapest chest for highest daily special chance. However, that's not the case. Inno has deliberately made it so that you get more red keys than green and blue keys. Red gems spawn 40% of the time, with green and blue only spawning 30% of the time each, both in the starting gems and spawned gems. This means that in practice, the number of red keys you'll have will likely be a bit above 40%, while the number of green and blue a bit below 30% each.
So when opening chests, it is crucial that you balance the number of keys you have. That means you can't always open the most expensive or least expensive chest, but you have to choose based on which one has most red compared to blue and green keys (or whichever key you have the least of). Balancing should be the main deciding factor in your chest choice each turn. You can make "sub-optimal" choices every now and then for the chest you want, but if you don't balance enough you will end up with a lot of unused keys in the end. I think it's best to do balancing first until you have roughly equal number of each key, and then go for the chest size you want.
1st Chest Each Day:
Another important factor when deciding which chest to open is the fact that the first chest of a day gives 2x rewards. This includes grand prize progress, which can be important for getting the main building fully leveled (more on that in strategies). So if you want max progress from chests, you want to open the Gold 2 chest as the first chest each day. Luckily it's the most likely chest to appear, appearing over 70% of the time, but as it's not guaranteed this also means you might have to open a few chests until you get it as an option. Again, chests don't reset at midnight, so you want to make sure you have the Gold 2 chest as an option before you enter a new day for maximum benefit. If you do this you will lose out on a lot of keys for the daily specials you really want, so I will discuss if this is necessary in the strategies section :)
Event Strategies
Alright, let's talk about strategies. For this event there are two main aspects of strategy, which are when you should play the minigame, and when you should open chests. Before answering those, we need to go through a few aspects of the minigame. Just as a reminder, you need 3750 progress to get the Tower of Conjuction fully leveled, so that will be the target for my analysis here.
How much Energy should you spend per board / should you clear the full board?
Based on my testing, you should not clear full boards, it is too expensive and you don't get enough in return. On beta I was able to test a few different approaches, including clearing a board, and spending 100, 120, and 160 Energy per board. When clearing boards, I had to spend an average of 375 Energy per board. Before I show my comparison, let me quickly clarify how spending between 100-160 Energy works.
If you spend a fixed number of Energy per board you have to manually use the reset to get new boards. Because the cost of this doubles each time (and resets at midnight), you have to play games every day for the best results. This means that we can break down the available total Energy you expect to have into 21 days. In total you have 10560 energy for free, which means you have 503 Energy per day. You are very likely to get a decent amount from incidents, I got 1120 which would be an additional 50 per day, so somewhere between 500 and 550 Energy per day is a good estimate. The three strategies I tested were:
- Spending 4x100 Energy per day, plus 0+20+40+80=140 Energy per day to reset boards, for a total of 540 Energy / Day, 11340 total Energy.
- Spending 4x120 and 3x120 Energy alternating days, 140 or 60 to reset boards, for a total of 525 Energy / Day, 11025 total Energy.
- Spending 3x160 Energy per day, plus 0+20+40=60 Energy per day to reset board, for a total of 540 Energy / Day, 11340 total Energy.
Note: You use the first daily reset before the first board of a day, and after completing the final board of a day you do not reset, you wait until the next day.
If you follow any of these strategies and don't have enough total Energy, simply don't spend as much on the final day(s), this is not a big deal. So, let's run through my results from beta! In the tables below I use 11000 Energy as the number for total Energy. I have also included progress from spending keys in the progress calculations, at a rate of 1.39 progress per key, which is my estimate from beta from balancing chests with a focus on Gold chests. This does not include any 2x bonuses.
| Strategy | Sample Size | Total Boards | Progress / Energy (highest best) |
Energy / Key (lowest best) |
Total Progress | Total Keys |
|---|---|---|---|---|---|---|
| 4 x 100 Energy | 24 Boards | 84 Boards | 0.386 | 7.51 | 4246 | 1465 |
| 3.5 x 120 Energy | 21 Boards | 74 Boards | 0.381 | 7.55 | 4191 | 1456 |
| 3 x 160 Energy | 24 Boards | 63 Boards | 0.367 | 7.59 | 4037 | 1449 |
| Clearing Boards | 25 Boards | ~29 Boards | 0.229 | 11 | 2519 | 1000 |
Update: People have been wondering what they should be aiming at each day in terms of progress, so let me break it down. You need 3750 total progress across the event, and based on my testing you get roughly half your progress from merging, half from keys (regardless of which strat). You need 3750/21 ≈ 180 progress per day, so if we break that down it means you need around:
- 90 Progress / Day from Merging
- 90 Progress / 1.39 ≈ 65 Keys / Day
So anything above that and you'll be fine! As mentioned you can also get 9 keys from daily challenges every day. These are not included in the numbers here, you should be able to get around 180 additional keys, for 250 additional progress.
Based on these results, 4x100 seems to be the best strategy, however there is really not a big difference between spending 100, 120, and 160 energy (and I imagine any other value in-between), so any of these should work fine. Clearing boards is way below in both progress and keys, so I strongly recommend against that strategy. The only situation where clearing boards is probably best is when the reset cost is 320 or more, but unless you spend diamonds you won't get there.
How can you adjust your strategy if you miss days?
If you miss any days, you should redistribute the Energy not used across the other days. Say you use the 4x100 strategy and miss out on 2 days in the beginning, that's 1080 additional Energy you need to spend across the remaining days. Say you have 18 remaining days, that is 60 Energy per day on average. So you can decide to either spread these evenly across the games, or for example do 3x100 and 1x160 per day. If you feel like you have a good understanding of the game, you can choose to spend more when the board looks good, or you could just decide on the board before you start playing.
When should you open chests?
Another big question is when to open chests. The first chest of a given day gives you double the rewards, including double progress toward grand prizes. That means you could get up to 21*27 = 567 additional progress towards grand prizes, which will give you 2 extra grand prizes.
However, as I went over in the previous chapter, you should be able to get above 4000 progress without these if you play the minigame every day, so it might not be worth it. You will need at least 21*18=378 keys for this, and definitely some more to get to the largest chest every day, so you are probably looking at around 1/3 of your total number of keys. In other words, you only have 2/3 of the keys for the daily special(s) you want.
If you can't play every day, or you want to play it safe, then by all means go for double chest every day. Going for the first chest every day has no negative side effects except for lowering the number of daily specials you can get when you spend the majority of your keys. If you feel like you know what you're doing and want the most daily specials, then I would recommend not going for the first chest every day!
Can you get the Tower of Conjunction fully leveled for free?
As I've gone over in the previous chapters, it is absolutely possible to get the Tower of Conjunction fully leveled for free. Playing every day is optimal and recommended, but even if you can't play every day you should have a decent chance of getting the main building fully leveled. You can't save everything for the final day, though, you will still need to play on as many days as possible.
If you play every day, open the 2x chest every day, and do all daily challenges, you might be able to get all the way to 5000 progress, 1250 above the 3750 required. In other words, you have a good buffer to play sub-optimally or miss out on days, but the more days you miss out on the more progress you will lose. If you know you will miss out on days, you should probably open the 2x chest on more days to be safe, but otherwise it doesn't appear to be necessary for a full Tower of Conjunction.
How many Daily Specials can you expect?
As mentioned above, you should be able to get around 1400-1600 keys, depending on strategy and how many daily challenges you complete.
The daily special % per key ranges from 1.33 to 1.67 depending on which chest you open. I don't have a lot of data on opening chests, but I do have some data from me opening 111 chests on beta while balancing keys and prioritizing gold chests. My result there was 44.2% Gold 2, 13.5% Gold 1, 10.8% Silver 2, 11.7% Silver 1, 12.6% Bronze 2, and 7.2% Bronze 1, which would give a weighted average of 1.44% per key. Using these numbers, the average number of daily specials is:
| Chance per Key | Keys | Daily Specials |
|---|---|---|
| 1.33 | 1400 | 18.6 |
| 1.44 | 1400 | 20.2 |
| 1.67 | 1400 | 23.4 |
| 1.33 | 1600 | 21.3 |
| 1.44 | 1600 | 23.0 |
| 1.67 | 1600 | 26.7 |
Getting 1.33 or 1.67 chance per key is not practically possible, so my estimate is between 20 and 23 daily specials on average. Of course, as usual this will vary a lot from player to player.
Diamond Spending Costs
Buying Energy with diamonds is really expensive, so personally I would save diamonds for the wildlife event. To get a second full Tower of Conjuction, you will likely need to buy 16*820 = 31840 diamonds, playing 5x170 boards per day. Playing 5x170, you will spend 850 per day on gems, and 300 per day on resetting boards. That's a total of 24150 Energy, which means you need 470 Energy from incidents.
If I exclude reset costs from my progress / energy calculations from previous chapters, I got around 0.413 progress per energy spent on gems when spending 160 on gems. This is probably slightly lower with 170 energy per board, so let's assume 0.4 progress per energy. With 850 energy spent on gems per day, that would result in 17850 spent on gems, for a total of 7140 progress. Add in 250 from daily challenge keys and 567 from 2x big chest every day, and you get to 7957 progress. You need another 100ish Energy for the final 43 progress, which should be easy enough to get from incidents. If you don't get anything from incidents at all, you need at most an additional 1990 diamonds.
So my estimate for a second Tower of Conjunction is around 32-35k diamonds.
If you want to spend even more diamonds, you should probably shift to clearing boards after you have reset the board 5 times a day. You can calculate what you need yourself using the numbers from the previous chapters.
In terms of daily specials, my estimate is that you will get around 1 key every 11-12 Energy you buy with diamonds, both for the first ~35k diamonds and any subsequent diamonds you use to clear boards. Using the 1.44% daily special chance per key estimate you will need:
- Keys per Daily: 1/0.0144 = 69.44 Keys
- Energy per Daily: 66.44*11.5 = 798.6 Energy
- Diamonds per Daily 798.6*(1990/820) = 1938 diamonds per daily special.
Spending diamonds is bad for both grand prizes and daily specials, so my recommendation is to save your diamonds for future events. Wildlife is a really good option :)
And that's it for this guide! I hope you found it helpful, and please let me know in the comments if you have any questions!
Table of Contents
- Table of Contents
- Event Rewards
- Quest "Cheat List"
- Event Mechanics - Minigame Tutorial!
- Event Strategies!
- Diamond Spending Costs
- Comments