2023 Fellowship Event Minigame Tutorial & Strategy Guide!
Hello! My name is MooingCat and welcome to my tutorial and strategy guide for the 2023 Fellowship Event! In this guide I will go through all the mechanics of the event, and I'll go through a range of strategies on how best to play the event! I have a lot of different resources and videos for this event, you can check them all out here:
My Written Guides
Spreadsheet
- Event Spreadsheet | Short Link: https://bit.ly/FellowshipSheet
- Building Upgrade Plans | Short Link: https://bit.ly/FellowshipBuildingPlan
Videos
- Event Overview & Strategy Guide | Link: https://youtu.be/ViI4iw79BwA
- Town 1 Walkthrough | Link: https://youtu.be/E-57UFqDetI
- Town 2 Walkthrough | Link: https://youtu.be/-Ka0jVgf6yM
- Town 3 Walkthrough | Link: https://youtu.be/10hDt_m6OhE
- How to use my Event Spreadsheet (St. Pat) | Link: https://youtu.be/O6wX0AYrqoE
Table of Contents
Event Rewards
Let's start by quickly looking at the rewards! This event is quite unusual in this regard, as there are two ways of getting Upgrade kits for the main building. The biggest difference, though, is that there are no Daily Specials. Instead, the "minor" rewards are given after you complete a "task", and the "daily special" is rewarded from "chests" after each town (or "Banquet" as they are called this event). Don't worry, I'll explain what all of that means, but before I do let's look at the main building!
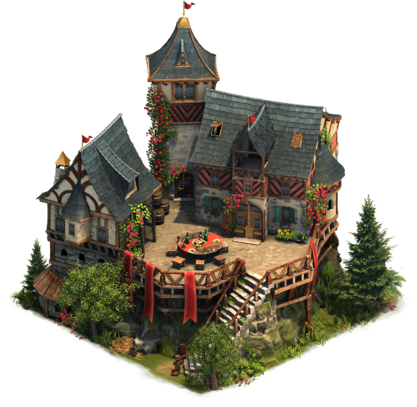
Main Building: Summerhold Manor / Sunhaven Palace
The main building is 4x4 and has 10 levels. To upgrade it to the final level you need a special "Golden" upgrade kit, more on how to get that later!
Summerhold Manor Level 9:
- Size: 4x4 (road required)
- Happiness
- 4-9 Forge Points
- 30 Goods + 5 Prev. Age Goods
- 1 Feast and Fables Selection Kit Fragment (100 Required)
- 50% 2FP Pack, 30% 5FP Pack, 20% 10FP Pack
- 15-25% Attack for Attacking Army
- 9-21% Defense for City Defense
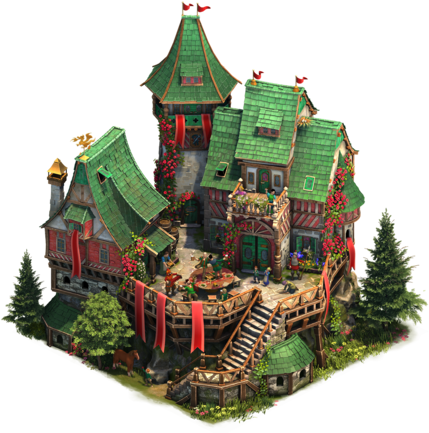
Summerhold Manor Level 10: Sunhaven Palace
- Size: 4x4 (road required)
- Happiness
- 9-13 Forge Points
- 40 Goods + 10 Prev. Age Goods
- 3 Feast and Fables Selection Kit Fragments (100 Required)
- 20% 2FP Pack, 30% 5FP Pack, 50% 10FP Pack
- 27-35% Attack for Attacking Army
- 15-31% Attack for City Defense
- 21-31% Defense for City Defense
- 30-35% Coin Boost
The level 9 building is already quite good, with a very high attack boost for its size. With all the other rewards, including the Feast and Fables selection kit (more on that in the next chapter), it's definitely worth placing. Upgrading to level 10 makes it even better, so definitely worth trying to get it leveled.
You get 3 upgrade kits from the milestone rewards and the level 1 building from the first grand prize. Outside of that, there are two ways of getting more upgrade kits and level 1 buildings for the Summerhold Manor:
- After you complete a town you can use gemstones to open "celebration chests". One of these chests will always have either the upgrade kit or the level 1 summerhold manor. You don't know under which chest it is.
- For every 25 "tasks" you complete you get one Grand Prize.
Grand Prizes
In this event you get an upgrade kit for every other grand prize, which means you get an upgrade kit at grand prize 1,3,5,7 etc. The Grand Prizes will first have a series of unique rewards, before it starts looping. We believe that is from 225 to 650.
| Progress (Tasks) | Rewards (Unique) |
|---|---|
| 0 | Summerhold Manor Level 1 |
| 25 | 30 Forge Points |
| 50 | Summerhold Manor Upgrade Kit |
| 75 | 150 Goods |
| 100 | Summerhold Manor Upgrade Kit |
| 125 | 30 Forge Points |
| 150 | Summerhold Manor Upgrade Kit |
| 175 | Portrait ("Oswald") |
| 200 | Summerhold Manor Upgrade Kit |
| Progress (Tasks) | Rewards (Looping) |
|---|---|
| 225 | Summerhold Manor Level 1 |
| 250 | Summerhold Manor Upgrade Kit |
| 275 | One Up Kit |
| 300 | Summerhold Manor Golden Upgrade Kit |
| 325 | Heroes Tavern Golden Upgrade Kit |
| 350 | Summerhold Manor Upgrade Kit |
| 375 | 30 Forge Points |
| 400 | Summerhold Manor Upgrade Kit |
| 425 | 150 Goods |
| 450 | Summerhold Manor Upgrade Kit |
| 475 | 40 Forge Points |
| 500 | Summerhold Manor Upgrade Kit |
| 525 | 175 Goods |
| 550 | Summerhold Manor Upgrade Kit |
| 575 | 50 Forge Points |
| 600 | Summerhold Manor Upgrade Kit |
| 625 | 200 Goods |
| 650 | Summerhold Manor Upgrade Kit |
To see the event pass rewards, check out the fandom wiki
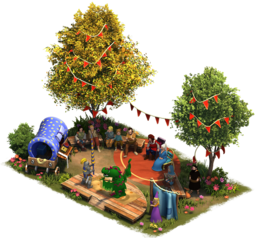
New Buildings: Feast and Fables Selection Kit
In addition to the main building, we also have two new buildings in the Feast and Fables Selection Kit! You can win this selection kit by buying all 6 chests after you complete a town, more on that below.
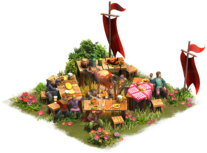
Jester's Stage:
- Size: 2x3 (road required)
- Happiness
- 10-35 Goods
- 3 Finish Special Production Fragments (30 Required)
- 50% 2 Blueprints, 30% 4 Blueprints, 20% 6 Blueprints
- 10-15% Attack for City Defense
- 17-22% Defense for City Defense
Grilling Grove
- Size: 2x2 (no road required)
- Happiness
- 1 Forge Point
- 2 One Up Kit Fragments (30 Required)
- 50% 2FP Pack, 25% 5FP Pack, 25% 10FP Pack
- 7-11% Attack for Attacking Army
- 9-13% Attack for City Defense
New Building: Trailside Smithy
Finally, we have the Gold League exclusive Trailside Smithy, a 1x1 building with no road requirements. You can only get one of these in this event by landing in the top 1% of players in the league.

Trailside Smithy
- Size: 1x1 (no road required)
- Happiness
- 4 Forge Points
- 5 Goods
- **Random Reward Fragments, 150 required for both kits:
- 90% 20 Summerhold Manor Selection Kit Fragments
- 10% 20 Summerhold Manor Golden Upgrade Kit Fragments
- 3-5% Attack for Attacking Army
- 3-5% Defense for Attacking Army
Leagues
New this time is the addition of leagues to the event. The league placement is based on the number of tasks completed. If you land in the top 20% (bronze+) you will get a selection kit for the main building, if you land in the top 5% (silver+) you also get a golden upgrade kit, and if you land in the top 1% (Gold) you get the Trailside Smithy mentioned above.
The cost to land in Silver+ was 508 tasks on beta, but it will likely be lower on live servers. Still, I don't think it will be under 300, so you probably still need to get the golden upgrade kit from grand prizes. Therefore, the golden upgrade from leagues can be used on a second Summerhold Manor, but more on that later.

Secondary Rewards: Tasks & Celebration Chests (after town chests)
This event doesn't follow the usual pattern where you open a lot of rewards with a small chance of getting the daily special, instead those rewards are spread over two separate parts of the minigame.
Every time you complete a Task you get a small reward, similar to the ones you get in other events when you don't get the daily special. You can find a complete list on the Fandom wiki, but examples include FPs, Coins, Supplies, Units, Fragments, and more.
After you complete a town, you can open Chests to receive rewards that are similar to daily specials from other events. At the top of the window you can see the 6 different rewards hidden behind the 6 chests. These include things like upgrades for the Summerhold Manor, Heroes Tavern, buildings from previous events, and more. There are 6 different "slots" for these rewards, and each of the slots has its own pool of rewards. Below you can see a list of the available chest rewards for the different slots as they appeared on beta:
| Slot 1: Item | Slot 2: Previous Event | Slot 3: Heroes Tavern | Slot 4: St. Pat Event | Slot 5: Resources | Slot 6: Current Event Main Building |
|---|---|---|---|---|---|
| Finish All Supply Productions | Flower Maidens | Heroes Tavern Lv. 1 | Druid Temple Selection Kit | Medals | Summerhold Manor Lv. 1 |
| Finish All Special Productions | Knights Pavilion | Heroes Tavern Upgrade Kit | Celtic Forest Selection Kit | FPs | Summerhold Manor Upgrade Kit |
| Finish Special Production | Epic Fellowship 2023 Selection Kit | Celtic Farmstead Selection Kit | Goods | ||
| One Up Kit | 10 Blueprints |
Minigame Overview
In this chapter you'll get a complete overview of the minigame!
Currency: Gemstones
The main currency of this event is Gemstones. Gemstones can be gained from quests, milestone rewards, and incidents. In total, you can gain the following amount of gemstones for free:
- Starting amount: 200
- Daily Logins: 22*100 = 2200
- Rush Quests: 35*100 = 3500
- Daily Quests: 21*150 = 3150
- Milestones: 750+1400 = 2150
- Total: 11 200 gemstones
If you want to get the most out of this event, you want to be VERY careful where you spend your gemstones. I go much deeper into it in the strategy section, but here are my quick recommendations: You should spend gemstones on overseers (managers), but only enough to complete that town's specific tasks (and not necessarily all tasks). Depending on your strategy you should spend gemstones on some or all chests after a town. Again, I go over when I recommend buying chests in the strategy section. I do NOT recommend spending gemstones for time boosts to speed up productions, it's simply too expensive. The only exception is towards the end of the event if you really need to finish a town.
Minigame Introduction - How the Towns/Banquets Work!
Your goal or target in the minigame is to gather 8.4Q (Quadrillion) Feast Rations to complete "Banquets". "Banquets" are what was known as "Towns" in the St. Patrick's Day event, so that is what I'll be using in my guides for simplicity. One exception to this is the very first town you play, here you only need 1M (million) *Ffeast Rations, but otherwise the town functions exactly the same. You produce and collect feast rations with your buildings, which need overseers (managers) to operate and increase productivity. In addition to collecting feast rations, you will also be completing tasks that give you rewards and progress towards the Grand Prizes**. So, let's go over all of these things in turn!
Before that, though, I need to mention one important thing. While the base mechanics stay the same throughout the event, the tasks will be different from one town to the next. There are three different sets of tasks, and these are referred to as town 1, town 2, and town 3. After the third town you start over again at town 1, so when you hear people say "town 1/2/3", it's not referring specifically to the first three towns, but the different sets of tasks you can get. So for your fourth town you will have the "town 1" tasks again, for your fifth town "town 2" tasks, and so on. With that out of the way, let's move on!
Buildings
There are three types of buildings, responsible for producing, transporting, and collecting feast rations. The production buildings (Spices Emporium ("Spice"), Juice Emporium ("Juice"), Farm, Bakehouse ("Bakery"), Gourmet Butchery ("Butchery")) produce feast rations and stockpile them on the eastern side of the board. To collect these feast rations, they first need to be transported over to the western side by the Carriage, before they are collected from the western stockpile by the Banquet Hall ("Banquet").

During the minigame, your goal is to level up your buildings to complete tasks, and to reach a stage where you can produce the 8.4Q feast rations required to move on to the next town. This means going back and forth between leveling production, transport, and collection buildings. You start each town with only the Banquet, Carriage, and Spice, but as you progress you will unlock the other production buildings, slowly increasing production. And to keep up with that you have to constantly upgrade Banquet and Carriage as well. In my event spreadsheet I have a page with my recommended upgrade orders for the buildings, so check out that if you're interested, I believe it might be the most useful thing I have to offer you this event!
So, each building must be leveled to increase its productivity. Each time you level the building the productivity increases slightly, and at each "milestone" level the production is increased massively. The milestones are slightly different for production buildings and transport/collection buildings, but in general this means that when you are upgrading buildings, you want to get them to these milestones for increased productivity. The progress bar above buildings shows your progress towards the next milestone, and each milestone multiplies the production by a factor:
| Banquet/Carriage | M1 | M2 | M3 | M4 | M5 | M6 | M7 | M8 | M9 | ... |
|---|---|---|---|---|---|---|---|---|---|---|
| Level | 10 | 25 | 50 | 100 | 150 | 200 | 250 | 300 | 350 | ... |
| Factor | 2 | 4 | 8 | 16 | 32 | 64 | 4 | 4 | 8 | ... |
| Production Buildings | M1 | M2 | M3 | M4 | M5 | ... |
|---|---|---|---|---|---|---|
| Level | 25 | 50 | 100 | 200 | 300 | ... |
| Factor | 2 | 4 | 8 | 16 | 32 | ... |
For those interested, the formula for the production value of the next level of a building is x[n+1] = x[n]*(1+1/n), and if it is a milestone level this is multiplied by the factor. So all values depend on the starting production of the building and which level it is. The cost of upgrading a building also depends on the starting cost. For the Carriage/Banquet, the cost is increased by x1.1 each level, for the production buildings it's increased by x1.15.
Overseers (Managers)

In addition to levels, Overseers also impact the productivity of your buildings. These are the same as "Managers" in the St. Patrick's Day event. Without an overseer you have to manually collect your buildings, so you always want to level your overseers to at least level 1. Beyond level 1, though, you should only level your overseers if it is required for tasks (see next chapter for more details on tasks). You can level each overseer up to level 5, and for each level you either increase productivity ("Prod") or speed up production time ("Speed"). While I wouldn't think too much about the details of the increases, I've included a table for those who want to know the details :)
| Banquet | Carriage | Spice | Juice | Farm | Bakery | Butchery | |
|---|---|---|---|---|---|---|---|
| Level 1 | +25% Prod | +25% Prod | +10% Prod | +10% Prod | +10% Prod | +10% Prod | +10% Prod |
| Level 2 | +50% Prod | +50% Prod | +50% Prod | +40% Prod | +35% Prod | +30% Prod | +25% Prod |
| Level 3 | +65% Speed | +30% Speed | +65% Speed | +65% Speed | +65% Speed | +65% Speed | +65% Speed |
| Level 4 | +100% Speed | +50% Speed | +100% Speed | +100% Speed | +100% Speed | +100% Speed | +100% Speed |
| Level 5 | +175% Prod | +150% Prod | +200% Prod | +130% Prod | +100% Prod | +60% Prod | +50% Prod |

As I mentioned, I wouldn't level overseers past level 1 when not required by tasks, and I also wouldn't recommend completing absolutely every task. I go into more detail about which overseers I recommend getting in the strategy section of this guide and in my guide on recommended upgrade order for buildings, but here is a quick table of my recommendations for the three different towns:
| Town 1 | Town 2 | Town 3 | |
|---|---|---|---|
| Banquet | 3 | 3 | 3 |
| Carriage | 2 | 3 | 3 |
| Spice | 3 | 1 | 1 |
| Juice | 2 | 3 | 2 |
| Farm | 1 | 1 | 2 |
| Bakery | 2 | 2 | 1 |
| Butchery | 2 | 2 | 2 |
Tasks

Finally, there are the tasks! Each of the three towns has its own set of 38 tasks. You will have 3 tasks active, and when you complete a task you get the next one on the list of tasks. You will get a small reward, such as FPs, Goods, Units, etc (you can see the full list on the wiki page), and for every 25 tasks you complete you get a grand prize. As mentioned, you get an upgrade kit for the Summerhold Manor every second grand prize.
There are a few different types of tasks:
- Hire/Upgrade Overseer for building X to level Z. For these tasks it doesn't matter when you upgrade the overseers, so you should do it immediately when you unlock the building.
- Build/Upgrade building X to level Z. Again it doesn't matter when you upgrade the building to the given level, if you've already done it the task will auto-complete.
- Transport/Collect/Produce X feast rations (in Z building). Here you have to transport/collect/produce the feast rations while the task is active. If a specific building is mentioned you need to do it in that building.
- Upgrade buildings X times. Here you have to upgrade buildings X times while the task is active. These are the main tasks to plan around.
Again I go deeper into it in the strategy section and my Upgrade Plans guides, but in general I don't recommend completing absolutely all tasks. Some of the final ones simply take too long, and a few tasks that require you to upgrade an overseer to a given level are too expensive. Below you can find a complete list of the tasks for each town, with a * in front of the tasks I recommend skipping. (Note: If you are playing slowly you have time to complete the long tasks, but I wouldn't level up overseers for the expensive tasks, I'd rather save the gemstones for chests)
Time Skip

The time skip allows you to "skip" ahead of time, immediately giving you feast rations according to your current rate of collection. It's important to note this means your lowest rate out of production/transportation/collection, and it does not account for (or give you) stockpiled feast rations on either side of the board.
In general I do not recommend using the time skips, they are simply too expensive for what they give you. The only exception would be if you are running out of time and need to complete the final town. For reference, the 8 hour skip costs almost 10% of your free gemstones. The cost for the time skips are:
- 2 Hours: 400 gemstones
- 4 Hours: 700 gemstones
- 8 Hours: 1200 gemstones
Completing Banquet/Town

When you complete a town (yay!) you are given an option of opening chests, each giving you one of the 6 rewards shown (at random). If you buy all 6 chests, you also get a Feast and Fables Selection Kit, the Summerhold Manor can be won from one of the chests this time.
At the top of the window you can see the 6 different rewards you can get, with each chest giving one of those rewards. Which chest has which reward is random. The first chest you open is free, then each chest will cost an increasing amount of gemstones. After you have bought 6 chests you get a new set of chests, but these have an increased cost compared to the previous set of chests (around twice the cost). If you buy all remaining chests at the same time with the "Open All" option, you get a ~25% discount on the cost! This means that whenever you plan to get all chests, you should do so all at once to save gemstones (the option will be available after opening the free chest). The cost to open chests is as follows:
| Chest Costs | Set 1 | Set 2 | Set 3 |
|---|---|---|---|
| Chest 1 | 0 | 50 | 100 |
| Chest 2 | 50 | 100 | 200 |
| Chest 3 | 100 | 200 | 400 |
| Chest 4 | 200 | 400 | 800 |
| Chest 5 | 500 | 1000 | 2000 |
| Chest 6 | 1000 | 2000 | 4000 |
| Total | 1850 | 3750 | 7500 |
| Total (discounted) | 1400 | 2800 | 5600 |
New this time around is that you don't get a main building selection kit when you buy all chests, instead you get the Feast and Fables Selection Kit, and the Summerhold Manor is moved to always be available from one of the chests. This means that getting upgrades from the chests can be cheaper if you are lucky to get it from one of the first chests. If you want to guarantee it, though, you still want to buy all chests at once for the discounted price. If you only need an upgrade from some towns, then it might be worth only opening a few chests each time. If you get it you get it for cheap, if you don't you can try again next town.
If you want to buy chests but do not have enough gemstones, you can close the window and come back later when you have enough gemstones. This does of course mean you can't advance to your next town, but depending on your strategy you probably have time to wait if you really want the reward. If you can't close the window yourself, closing and reopening the game should work as well.
Quest "Cheat Sheet"
As usual, I like to note down quests you need to plan around. This is quite a subjective list of what I consider "blocker" quests, or quests you can't complete immediately, but you might struggle with other quests than I do. You can find a complete list on the fandom wiki if you want a complete list. This "cheat sheet" only includes the part of a task that I consider challenging:
Strategies - Basic Concepts / Recommendations
A lot of the strategies I'm about to go over share some common concepts and recommendations, so instead of repeating those each time I will explain them here, and then explain any differences from these in the different strategies.
Summerhold Manor Level Sources
There are 4 different ways of getting levels for the Summerhold Manor:
| Source | Amount |
|---|---|
| Milestones | 3 Upgrades |
| Grand Prizes | 1 Upgrade per ~2 GPs, Lv.1 Buildings + Gold Upgrades |
| After Town Rewards | Upgrade or Lv. 1 Building in one of the chests |
| League Rewards | 1 Selection Kit in Bronze+, 1 Golden Upgrade in Silver+ |
You'll always get 3 from milestones, so it's the number of levels from grand prizes, after-town rewards, and league placement that differ from strategy to strategy.
Grand Prizes
Something different this time around is that you need to get the Golden Upgrade Kit from the event itself (unless you end in Gold League to get the Trail Smithy), which in practice means you need to complete 300 tasks to get it.
The Level 1 Building is also shifted away from the Milestones to the Grand Prizes, but you get it from the first free Grand Prize so that's ok. You get additional Level 1 Buildings from Grand Prizes between upgrades.
You can find a full overview of grand prizes at the top of this guide.
Celebration Chests - After Town Chests (how many should you buy?)
New this time is that the Summerhold Manor is included among the chests instead of as a selection kit when you buy all 6. This means it is possible to get it cheaper than previous St. Pat events if you are lucky. However, if you don't get it by the first 5 chests, you will end up spending more than if you just bought all 6 at once for the discounted price.
So my basic recommendation is that when you absolutely need the Summerhold reward then buy all chests at once for the discounted price. If you only need it from a few of the towns you plan on completing, I recommend choosing a number of chests to open based on how many gemstones you can afford to spend, then buy up to that number of chests. If you get the Summerhold you can stop, if you don't then simply move on without getting it from this town.
For example, if you plan on completing 10 towns you will have 4700 free gemstones with my strategy (more on that below), which means you can spend 470 gemstones per town on chests. That's enough to open at least 4 chests each town, some towns 5 chests. Say you need 2 upgrades from the chests, you can buy 4 chests after each town until you have those 2 upgrades, which you'll very likely be able to achieve.
In my spreadsheet I have made a widget where you can enter how many towns and how many chests you want to buy after each town, and it'll give you an estimated max cost and number of upgrades you can get from this.
It's worth noting that the chest reward can be either the upgrade or the level 1 Summerhold, likely at an 8/1 split. This means not every town will have the upgrade, you will most likely not need the level 1 building as you can get it easily from grand prizes.
Leagues
Leagues are unlikely to matter for the first full main building. The 300 tasks you need to get the golden upgrade from grand prizes is likely not enough to land in Silver+ league, and if you only land in Bronze you need to get 300 tasks regardless for the golden upgrade kit. If you complete 300 tasks you already have enough Summerhold levels, so you don't need the additional kit from Bronze+ leagues. However, if you are going for 2 main buildings, the leagues are absolutely important. Landing in Silver+ will mean you don't have to get the 2nd golden upgrade kit from grand prizes, which will save you a lot of diamonds. More on this later. #### Gemstones The core concept of different strategies is managing the number of gemstones you spend on overseers and after town chests. Going heavy on tasks for grand prizes means more towns and more gemstones spent on overseers, but also fewer gemstones for after town chests and upgrades from those.Because you need to complete 300 tasks to get the golden upgrade kit, a lot of the strategies focused on spending a lot on after town chests no longer work too well. You can still use them, but you will not get the golden upgrade kit if you do. Therefore, my recommended strategies will be more focused on spending gemstones for overseers, with the spare gemstones reserved for chests.
Overseer Levels
For most strategies, I recommend the following overseer levels. This is in my opinion the optimal balance between gemstones spent and tasks completed.
| Town 1 | Town 2 | Town 3 | |
|---|---|---|---|
| Banquet | 3 | 3 | 3 |
| Carriage | 2 | 3 | 3 |
| Spice | 3 | 1 | 1 |
| Jucie | 2 | 3 | 2 |
| Farm | 1 | 1 | 2 |
| Bakery | 2 | 2 | 1 |
| Butchery | 2 | 2 | 2 |
If you want to speed up town 1 by a few hours you can upgrade Carriage overseer to level 3 for a few more gemstones.
Tasks Completed
With the overseers listed above, you can complete up to 36 tasks in each town. However, some of these are very slow, so my base recommendation is that you complete 33, 32, and 32 tasks in towns 1, 2, and 3. This means that you skip the following tasks:
| Town 1 | Town 2 | Town 3 |
|---|---|---|
| 22. Upgrade Farm Manager to Level 3 | 18. Hire Level 3 Farm Manager | 20. Hire Level 3 Bakery Manager |
| 25. Upgrade Carriage Manager to Level 4 | 33. Upgrade Jucie to Level 200 | 23. Upgrade Banquet Manager to Level 4 |
| 36. Collect 16Q Feast Rations | 35. Upgrade Carriage Manager to Level 4 | 35. Upgrade buildings 200 times |
| 37. Upgrade buildings 250 times | 36. Collect 18Q Feast Rations | 36. Collect 12Q Feast Rations |
| 38. Upgrade Butchery to Level 75 | 37. Generate 200B Spice in Spice Emporium | 37. Upgrade Bakery to Level 100 |
| 38. Upgrade buildings 200 times | 38. Generate 10Q Feast Rations in Bakery |
Task 36 in towns 1/2 (collect X quadrillion Feast Rations) could be completed if the timing works out better. For example, if you would get 8.4Q Feast Rations in the middle of the night you can wait until the morning, completing task 36 as well :) Click the button below for a complete list of tasks:
Building Upgrade Plans
To complete the tasks above, you need to take care of when and how you level up your buildings. You can find my recommended upgrade orders in my spreadsheet: (http://bit.ly/FellowshipSheet).
- Fellowship Building Upgrade Plans: https://bit.ly/FellowshipBuildingPlan
You can also use this image version:

I think the plans are quite self-explanatory: Upgrade the buildings in the order laid out (left to right), if two or more buildings are in the same column upgrade them simultaneously. The levels inside the "Upgrade X" brackets should be upgraded while the "Upgrade building X times" task is active (at latest, you'll often be able to start them earlier, which is a good thing). Other than that just collect tasks as they complete :) I've also made video walkthroughs of the guides, if you prefer video or want to see the plans in action as well!
FoE Helper Strategies
New this year is that you can import my building upgrade plans directly into the FoE Helper module, and it will keep track of your progression for you! Using it is simple; after you have started a town, click on the "edit" symbol and write in your strategy. To use mine, simply copy from these pastebins and paste that into the popup window from FoE Helper.
- Town 1 Strategy: https://bit.ly/FellowshipStrategyTown1
- Town 2 Strategy: https://bit.ly/FellowshipStrategyTown2
- Town 3 Strategy: https://bit.ly/FellowshipStrategyTown3

Strategies!
Below you can find descriptions of all my different strategies!
Strategies Overview!
As you can see in the screenshot below there is a wide range of strategies to go for! In the following chapters I will describe these in some more detail, but because there are so many I have split them into 4 categories:
| Category | Number of Towns | Golden Upgrade |
|---|---|---|
| "Sunhaven Palace" | 9 - 10 | Yes (1) |
| "Gold League Chasers / 2 Sunhavens" | 17 - 20 | Yes (2) |
| "Chill Strategies" | 2 - 7 | No |
| "Chasing 2 Summerholds" | 11 - 16 | Yes (1-2) |
The main difference between the strategies is the number of towns you complete, and thus how many tasks you are able to complete and how many times you need to buy chests after a town for upgrade kits. The more towns you do, the more gemstones you need for overseers, and the less you can spend on chests. Unlike previously, you don't have too much choice if you want to get the golden upgrade kit. To achieve that, you need to complete 9+ towns, which also means you get all the upgrades you need from grand prizes.
In the "Extra Gems" row in the image below you can see that many of the strategies have a lot of spare gemstones. You can use these as you wish, I would recommend using them for more chests after towns.

You can also find this in my spreadsheet: http://bit.ly/FellowshipSheet
"Sunhaven Palace": 9 - 10 Towns Strategies
These are my recommended strategies for getting a single Summerhold Manor fully upgraded to the Sunhaven Palace. Both will achieve that, however the 10-town strategy will also provide the Golden Upgrade kit for the Heroes Tavern, so I would recommend that over the 9-town strategy. With both of these strategies you get all the upgrades you need from Grand Prizes, however you will have a decent amount of spare gemstones. These you can use as you wish on chests after towns, and for example to upgrade Carriage to level 3 in town 1 to save a few hours on the completion time of that.
| Strategy | 9-Town | 10-Town |
|---|---|---|
| Summerhold Levels | Lv. 9 + Lv. 1 | Lv. 9 + Lv. 1 |
| Golden Upgrades | 1 | 1 |
| Full Sunhaven Palace | Yes (1) | Yes (1) |
| Upgrades From Chests | 0 | 0 |
| Levels From Grand Prizes | 7 + 1 Golden | 7 + 1 Golden |
| Tasks | 300 | 325 |
| Heroes Tavern Golden Upgrade | No | Yes (1) |
| Towns | 9 (+9 Tasks) | 10 (+1 Task1) |
| Max Time/Town | 58 Hours | 53 Hours |
| Tasks / Town | 33 / 32 / 32 | 33 / 32 / 32 |
| Gemstones / Town | 620 / 710 / 630 | 620 / 710 / 630 |
| Gemstones Needed | 5930 | 6550 |
| Extra Gemstones | 5270 (585 per town) | 4700 (470 per town) |
All of the towns follow my recommended building upgrade plans mentioned further up in this guide and in my event spreadsheet. The 9-town strategy requires 9 additional tasks, which can either be from additional tasks in the 9 towns, or 9 quick tasks in a 10th town (which you don't have to complete). You only need the first 3 managers to level 1 to get these 9 tasks in a 10th town. For the 10-town strategy you need 1 extra task, which can easily be completed in one of the 10 towns or in an 11th town.
"Gold League Chasers / 2 Sunhavens": 17 - 20 Towns Strategies
If you are up for a challenge, I think you have a very good chance of grabbing two full sunhaven palaces for free! You might even be able to get the Trailside Smithy, but this will depend on the world you play on. Getting two full Sunhaven Palaces requires landing in Silver or Gold league, which on beta required completing 508 and 665 tasks, respectively. I expect these to be lower on live servers, but that will depend on how active your world is. In any event, I think the 550 tasks you get from the 17-town strategy should be enough for Silver on pretty much any world, perhaps with the exception of the newest worlds.
With the 20-Town strategy you get all the Summerhold upgrades you need from Grand Prizes, however for the 19 and 17 town strategies you are missing 1 and 2, respectively. These you can get from chests after towns, most likely without having to spend additional gemstones. You have 17 and 19 chances to get it from the free chest after a town, so you will likely get it the 1 or 2 times you need.
If you don't get it by the final two towns, then you need to spend extra gemstones to get the upgrades you need, but it is very unlikely this will be required.
| Strategy | 17-Town | 19-Town | 20-Town |
|---|---|---|---|
| Summerhold Levels | Lv. 9 + Lv. 9 | Lv. 9 + Lv. 9 | Lv. 9 + Lv. 9 |
| Golden Upgrades | 2 (inc. league) | 2 (inc. league) | 2 (inc. league) |
| Full Sunhaven Palace | Yes (2) | Yes (2) | Yes (2) |
| Levels From Chests | 2 | 1 | 0 |
| Upgrades From Grand Prizes | 12 + 1 Golden | 13 + 1 Golden | 14 + 1 Golden |
| Tasks | 550 | 600 | 650 |
| Heroes Tavern Golden Upgrade | Yes (1) | Yes (1) | Yes (1) |
| Towns | 17 (+9 Tasks) | 19 (-15 Tasks) | 20 (+3 Tasks) |
| Max Time/Town | 31 Hours | 28 Hours | 26 Hours |
| Tasks / Town | 33 / 32 / 32 | 33 / 32 / 32 | 33 / 32 / 32 |
| Gemstones / Town | 620 / 710 / 630 | 700* / 710 / 630 | 700* / 710 / 630 |
| Gemstones Needed | 11130 | 12940 | 13650 |
| Extra/Missing Gemstones | 70 | -1740 | -2450 |
*You need to speed up town 1 for 19 and 20 town strategies, so compared to my standard plans you need to upgrade Carriage overseer to level 3. Combine this with only upgrading Carriage to level 288 before getting Banquet to level 300, and you will save around 3.5 hours, for a completion time of around 23h30m.
Otherwise, all of the towns follow my recommended building upgrade plans mentioned further up in this guide and in my event spreadsheet. The 20-town strategy requires 3 additional tasks, which can either be from additional tasks in the 20 towns, or 3 quick tasks in a 21st town (which you don't have to complete). In the other strategies you complete just enough or more tasks than required, this means you can skip some tasks, or just complete them to compete for league placement.
"Chill Strategies": 2 - 7 Towns Strategies
These strategies require much lower effort than the others, but this comes at the expense of not getting the Golden Upgrade kit, and unlike previous events you can't get this after the event from a building, so you will likely have to wait until next year.
For all of these strategies you need to pick up upgrades from after town chests, however this time around you are not guaranteed to get the upgrade, you might also get the level 1 building as the choice, which is of no use. The chance is assumed to be 8/9 for the upgrade, and 1/9 for the level 1 building, but this is not confirmed.
For the 5+ town strategies this should be fine, but might be an issue for the 2 and 3 town strategies. If you plan to go for either of these, be prepared to have to pivot to a 5+ town strategy during the event. This shouldn't be a huge issue, you should have enough spare gemstones even if you buy 2 chest sets after the first town.
| Strategy | 2-Town | 3-Town | 5-Town | 7-Town |
|---|---|---|---|---|
| Summerhold Levels | Lv. 9 | Lv. 9 | Lv. 9 | Lv. 9 + Lv. 1 |
| Golden Upgrades | 0 | 0 | 0 | 0 |
| Full Sunhaven Palace | No | No | No | No |
| Upgrades From Chests | 4 (2x 2 sets of chests) | 3 | 2 | 1 |
| Levels From Grand Prizes | 2 | 3 | 4 | 6 |
| Tasks | 50 | 100 | 150 | 225 |
| Heroes Tavern Golden Upgrade | No | No | No | No |
| Towns | 2 (-15 Tasks) | 3 (+3 Tasks) | 5 (-12 Tasks) | 7 (-2 Tasks) |
| Max Time/Town | 1.5 Weeks | 1 Week | 4.4 Days | 3.1 Days |
| Tasks / Town | 33 / 32 | 33 / 32 / 32 | 33 / 32 / 32 | 33 / 32 / 32 |
| Gemstones / Town | 620 / 710 | 620 / 710 / 630 | 620 / 710 / 630 | 620 / 710 / 630 |
| Gemstones Needed | 9730 | 6160 | 6090 | 5940 |
| Extra Gemstones | 1470 | 5040 | 5110 | 5260 |
All of the towns follow my recommended building upgrade plans mentioned further up in this guide and in my event spreadsheet. The 3-town strategy requires 3 additional tasks, which can either be from additional tasks in the 3 towns, or 3 quick tasks in a 4th town (which you don't have to complete). The other strategies you complete more tasks than required, this means you can skip some tasks, or just complete them to compete for league placement.
"Chasing 2 Summerholds": 11 - 16 Towns Strategies
I've named these "chasing 2 summerhold" strategies as I believe it's possible (not guaranteed) to get two full summerholds with most if not all of these strategies. You won't necessarily get a Golden Upgrade for the 2nd building, but that's also possible. All of the strategies are based on getting the missing upgrades you need from the after town chests. For example, for the 13-town strategy you need 6 upgrades from chests, and you have 2740 gemstones to spend to get them. Assuming you get the upgrade 11 times, you have 250 gemstones per town to spend on chests, which means you can open up to 3 and 4 chests in alternating towns. That should give you a decent chance to get the 6 upgrade kits you are missing, but it's not guaranteed.
The more towns you do, the likelier I think it is you will succeed. With more towns, you also have a higher chance to land in Silver+ league, which will also give you the Golden Upgrade kit.
| Strategy | 11-Town | 13-Town | 14-Town | 16-Town |
|---|---|---|---|---|
| Summerhold Levels | Lv. 9 + Lv. 2 | Lv. 9 + Lv. 3 | Lv. 9 + Lv. 4 | Lv. 9 + Lv. 5 |
| Golden Upgrades | 1 | 1 | 1 | 1 |
| Full Sunhaven Palace | Yes (1) | Yes (1) | Yes (1) | Yes (1) |
| Upgrades From Chests | 0 | 0 | 0 | 0 |
| Levels From Grand Prizes | 8 + 1 Golden | 9 + 1 Golden | 10 + 1 Golden | 11 + 1 Golden |
| Tasks | 350 | 425 | 450 | 500 |
| Heroes Tavern Golden Upgrade | Yes | Yes | Yes | Yes |
| Towns | 11 (-6 Tasks) | 13 (+4 Tasks) | 14 (-3 Tasks) | 16 (-18 Tasks) |
| Max Time/Town | 48 Hours | 40 Hours | 37 Hours | 33 Hours |
| Tasks / Town | 33 / 32 / 32 | 33 / 32 / 32 | 33 / 32 / 32 | 33 / 32 / 32 |
| Gemstones / Town | 620 / 710 / 630 | 620 / 710 / 630 | 620 / 710 / 630 | 620 / 710 / 630 |
| Gemstones Needed | 7210 | 8460 | 9170 | 10420 |
| Extra Gemstones | 3990 | 2740 | 2030 | 780 |
All of the towns follow my recommended building upgrade plans mentioned further up in this guide and in my event spreadsheet. The 13-town strategy requires 4 additional tasks, which can either be from additional tasks in the 13 towns, or 4 quick tasks in a 14th town (which you don't have to complete). The other strategies you complete more tasks than required, this means you can skip some tasks, or just complete them to compete for league placement.
Diamond Spending
If you want to get 3+ Summerhold Manors, you should buy more chests after towns. Doing more tasks for more grand prizes is not really feasible beyond doing 20 or so towns, so pretty much all additional levels come from after town chests.
That means that you need to do enough towns to avoid having to buy the more expensive 2nd/3rd/etc set after towns. If you want more than 3 Summerhold Manors, you will quickly have to start buying more and more expensive chests. Similarly, the fewer towns you play, the more expensive chests you have to buy.
You will not be able to get more than 2 golden upgrade kits unless you get to 750 progress, which is impossible without even more diamonds for time skips or additional managers. However, if you manage to land in Gold league, you can get further golden upgrade kits from the Trailside Smithy.
One thing I want to add is that if you need to buy all chests more times than towns in your strategy, I recommend doing town 1 as quickly as possible, completing it, and then do the X towns you were supposed to. This will essentially give you 1 extra town to buy chests after, for very few additional gemstones.
And that's it for this guide! If you found it helpful feel free to share it with your friends and guild mates :) If you want to learn more about this event, check out my other content on it:
My Written Guides
Spreadsheet
- Event Spreadsheet | Short Link: https://bit.ly/FellowshipSheet
- Building Upgrade Plans | Short Link: https://bit.ly/FellowshipBuildingPlan
Videos
- Event Overview & Strategy Guide | Link: https://youtu.be/ViI4iw79BwA
- Town 1 Walkthrough | Link: https://youtu.be/E-57UFqDetI
- Town 2 Walkthrough | Link: https://youtu.be/-Ka0jVgf6yM
- Town 3 Walkthrough | Link: https://youtu.be/10hDt_m6OhE
- How to use my Event Spreadsheet (St. Pat) | Link: https://youtu.be/O6wX0AYrqoE